After winning a pair of tickets to see the Toronto Maple Leafs first playoff home game in the 2013 playoffs courtesy of The Toronto Star, I thought I’d share how I did it.
The pictures entered would be judged by spirit of the subjects in the picture, use of the poster provided by The Star, and creativity.
The inspiration for the shoot was a picture that one of my friends had shared on Facebook. The picture was not theirs. I have no idea who took this picture or whose child is pictured but I thought it was a great idea, save for the poor armless boy pictured.
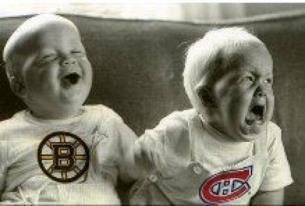
This photo was the inspiration for my project
So when the details for this contest came out, that picture was a starting point for me.
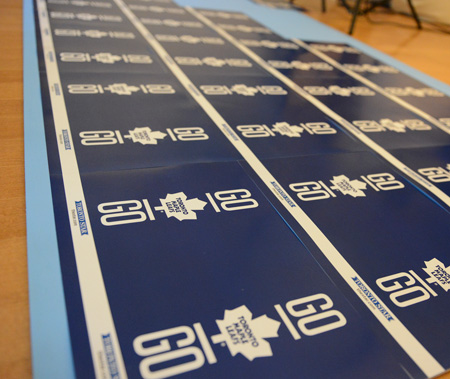
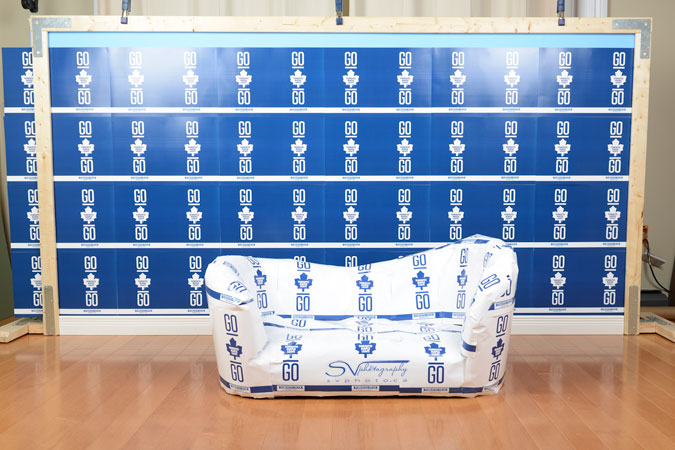
The poster provided by The Star came in either blue or white. So i started by covering one of the faux walls I have in the studio with the blue posters. These faux walls are just 4’x8′ sheets of plywood that I painted in various colours.
The faux wall in the process of being covered with the blue version of the Go Leafs Go posters
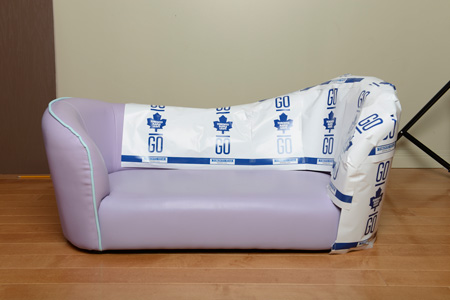
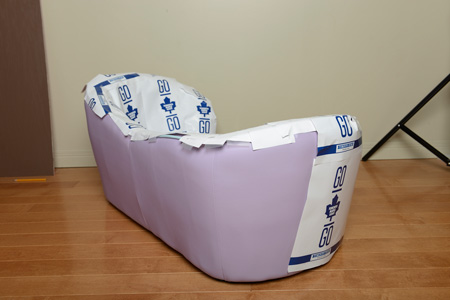
Next, I covered a small lilac lounger, normally reserved for portraits of little girls, with the white poster.
 |
 |
I then set up the couch in the photo studio, in front of the faux wall and placed two strobes at four and eight o’clock. I used a polarizing filter to cut down the reflection of the lights coming off the posters. Still, I had to put the strobes all the way up to the ceiling, any lower and the glare from the glossy posters became too much and a distraction.
Despite using a polarizing filter, there is still an obvious glare from the lights picked up on the glossy posters. Fortunately, it was high up enough that it would be cropped out in the final image.
Once the lights were set up, there were three main variables I needed to keep constant in order to seamlessly blend two pictures together.
First, the lighting/exposure needed to be constant from picture to picture. Once I set up the lights, I used my light meter to ensure proper exposure and dial those settings into my camera in Manual mode.
Next, there can be no movement of any of the static objects in the image–namely the couch. I used a weight bag filled with lead shot and placed it out of the shot behind the couch.
And lastly, there can be no movement in the camera from shot to shot. My trusty tripod from Really Right Stuff did the trick.
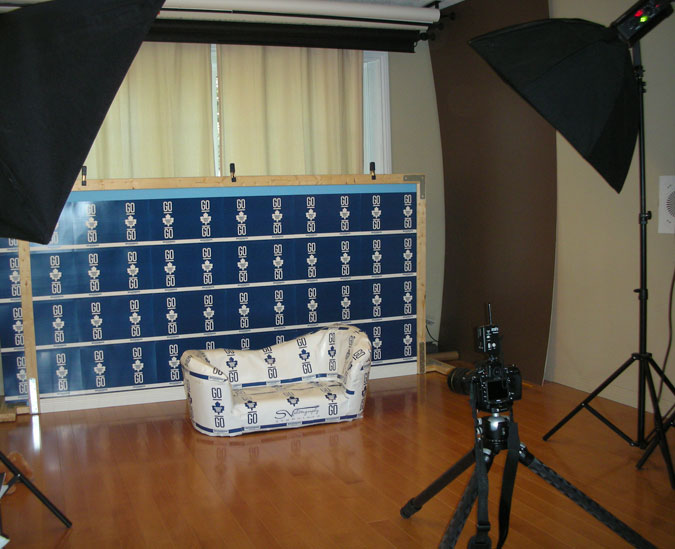
The completed set with the converted lounger, the faux wall, two strobe lights and the camera on tripod
So for the first images, I took shots of the happy baby wearing a Toronto Maple Leafs jersey on the right side of the couch (camera left).
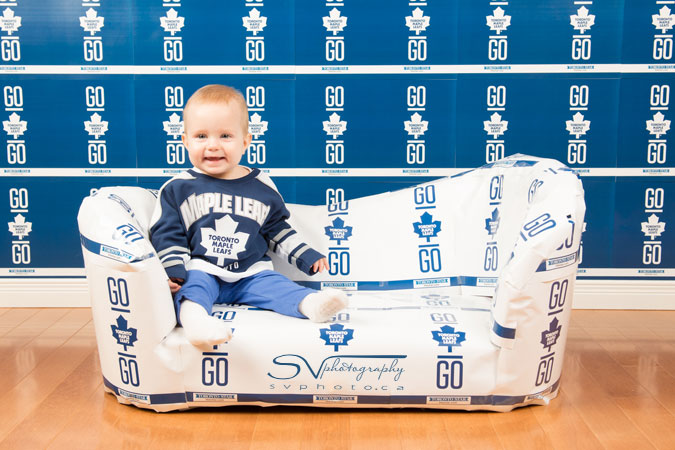
The first images: an obvious ecstatic baby just thrilled to be wearing the white and blue of the Toronto Maple Leafs
Next, I changed the baby into some Bruin’s wear and took pictures of the unhappy baby on the left side of the couch (camera right). As to why this normally happy baby is crying? Let’s just say who wouldn’t be crying when forced to wear the black and gold of the Bruins 🙂
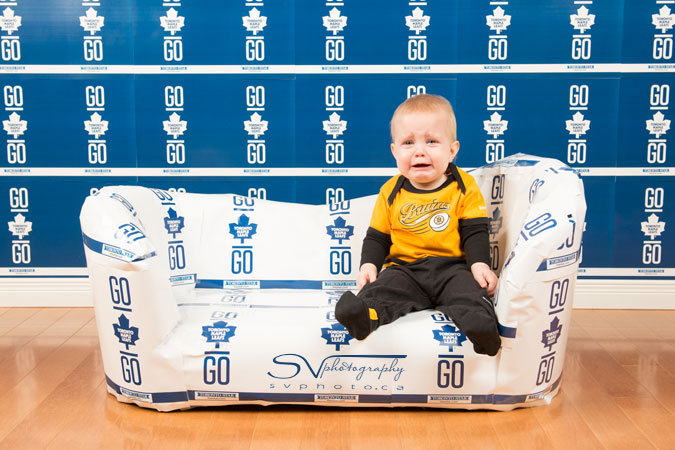
Same baby but what a difference! The visibly distressed baby shows displeasure at being forced to wear the black and gold of the Bruins
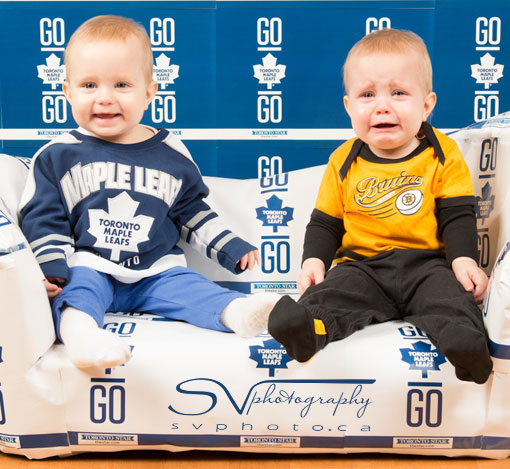
After choosing the two pictures I thought were the best, I put them together in PhotoShop. The only think I really needed to edit was the black sock in the forefront. I needed to cut that out pretty carefully because there was some overlap and past that on top of the other one.
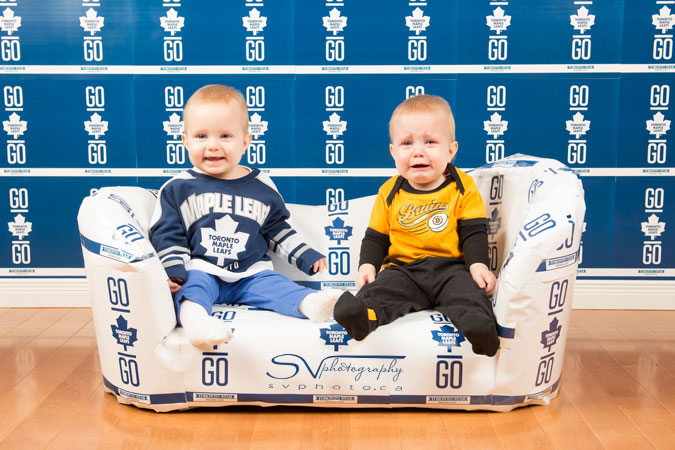
The final winning image, seamlessly stitched together in Photoshop. Most assumed incorrectly that the babies were twins.
And there you have it…a winner. Now if only I could say the same thing about my beloved Maple Leafs!
Share this Post