In portrait photography, it’s special when a series of photos tell a story and give some insight into the personality of the subject, be it real, implied, or open to interpretation. Another way to do this is to literally put them together—take several photos of a person or people moving through the frame and then combine them to make one final image.
In order to keep editing to a minimum here is the workflow I used to create the images below. Steps 1-4 are in the field, while steps 5-8 are in post processing.
- set up your camera on a tripod and compose the shot.
- set the camera to manual exposure setting (use a small aperature to get as much of the model in focus)
- set the camera to manual focus and focus on your model
- if possible, use a wireless remote to trigger the shutter, this will minimalize any additional movement
- once the photos have been taken they should be opened as layers in photoshop
- use the layer mask to paint over the parts you want to appear then select inverse
- some exposure compensation might be required to make the background the same throughout. I chose an image with a histogram in the middle as the main background image and then adjusted the background and then adjusted the others pictures to match. Usually the most that was required was +/- 0.3
- you’re done!
In this situation I was with Cindy at Guildwood Park in Scarborough, Ontario, Canada. If you’ve never been to this park, you should definitely make the trek. You can read more about the park and see more pictures of Cindy here.
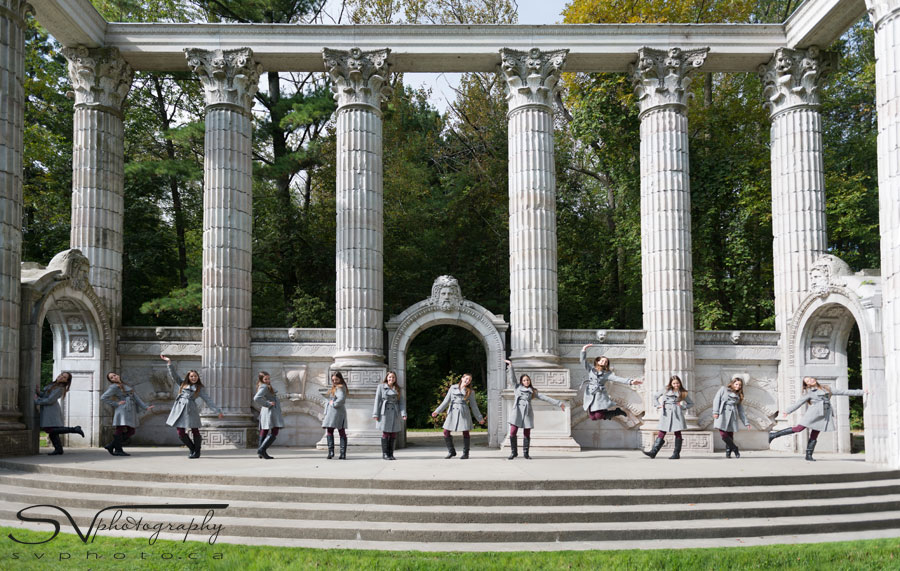
The centre piece of the park are columns rescued from the facade of the old Bank of Canada in Toronto. At the park, these columns are used to make a majestic amphitheatre, the perfect location to take several shots of Cindy and use them to make one final image.
I wanted to include all of the columns so I first composed the image. We then had her pose at the left part of the frame, take two steps to her left and then pose again, repeating this process until she reached the right end of the frame. We ended up with 12 shots to put together in Photoshop.
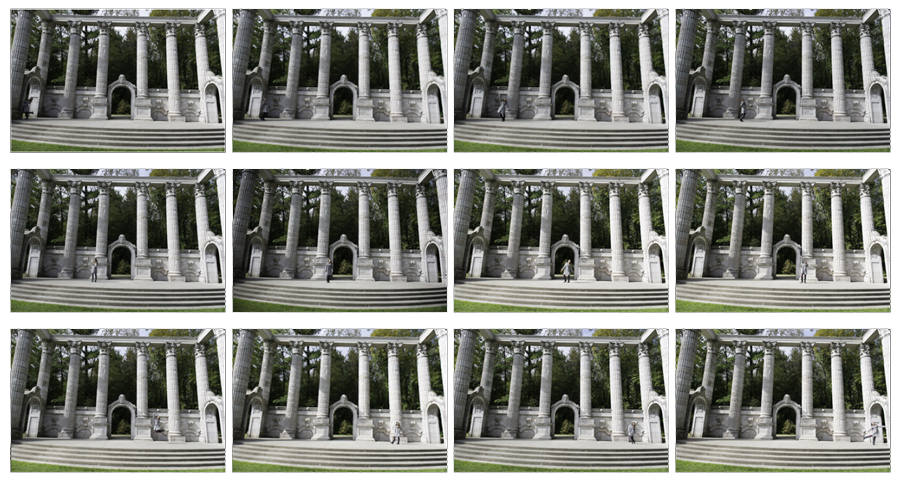
Here are the twelve pictures. You can just make out Cindy, as she moves across the frame. You’ll also notice the distortion evident in the columns leaning in to the middle of the frame, so some perspective control was applied to get the columns closer to being vertical.
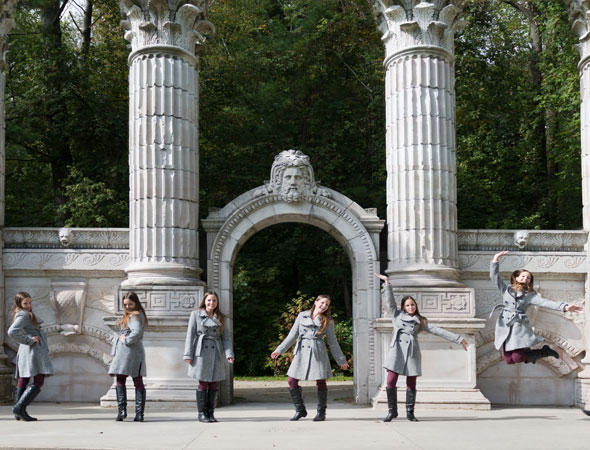
And here’s the single image after combining the layers as masks in Photoshop.
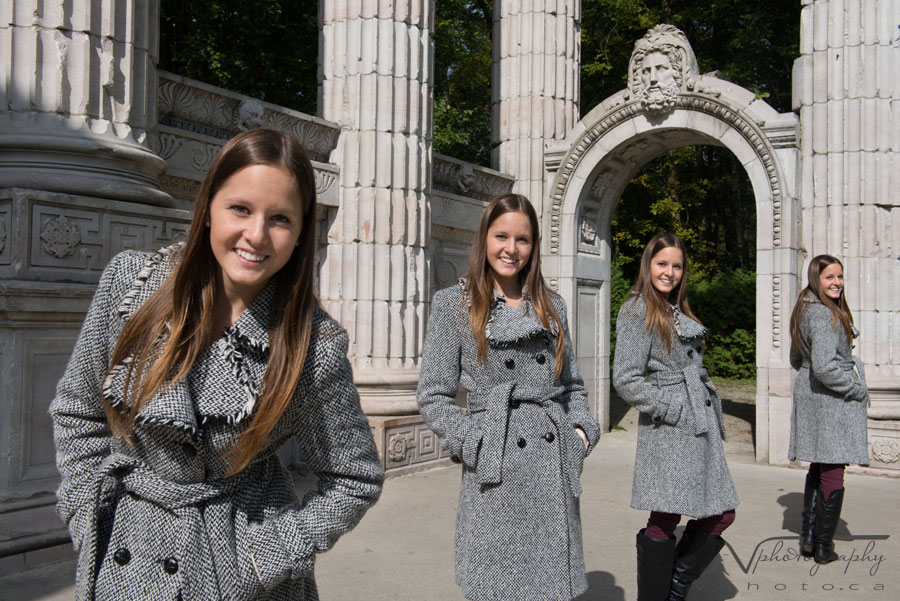
For the second one, I wanted to create a little depth to the picture. So Cindy did five poses as she was moving from the front of the frame to the back.
Here are the four pictures.

And here’s what the single image after combining the pictures as layer masks in Photoshop.
As you can see, this is a pretty creative way to take environmental portraits and with the proper set up on location, there is minimal work in post processing. Try it out and let me know how it goes!
Related Posts
Using Images to Create a Story
Using Pictures to Tell a Story
Series of Pictures to Show Change
Cindy in Guildwood Park
Cindy Part II
Cindy
Share this Post